There are a ton of ecommerce platforms and website builders out there to help you, even if you have no experience in web design or web development. I really like Square Online because it’s a great option for people who are just starting out, and a strong Shopify alternative. If you’re looking for something that’s easy and affordable, you’ll be pleased with Square’s online store.
I’ve written this guide to make the process of setting up your Square Online store easier for you. It’s not too difficult, and you can be selling products in no time.
If you complete each step as you read through this guide, you’ll be surprised at how fast the process goes, especially if you already have your logo and product images available.
How Square Online Works
Square Online is a free eCommerce website builder powered by Weebly that offers a quick and easy way to build and launch your store, no coding required. With their free plan, you can sell unlimited products and just pay 2.9% + $0.30 per transaction. With Square Online, you’ll be able to:
- List your products in an online store
- Accept payments for online sales
- Fulfill orders and handle inventory management
- Arrange for delivery and in-store pickup options
- Integrate it with your Square POS alongside your brick-and-mortar store locations.
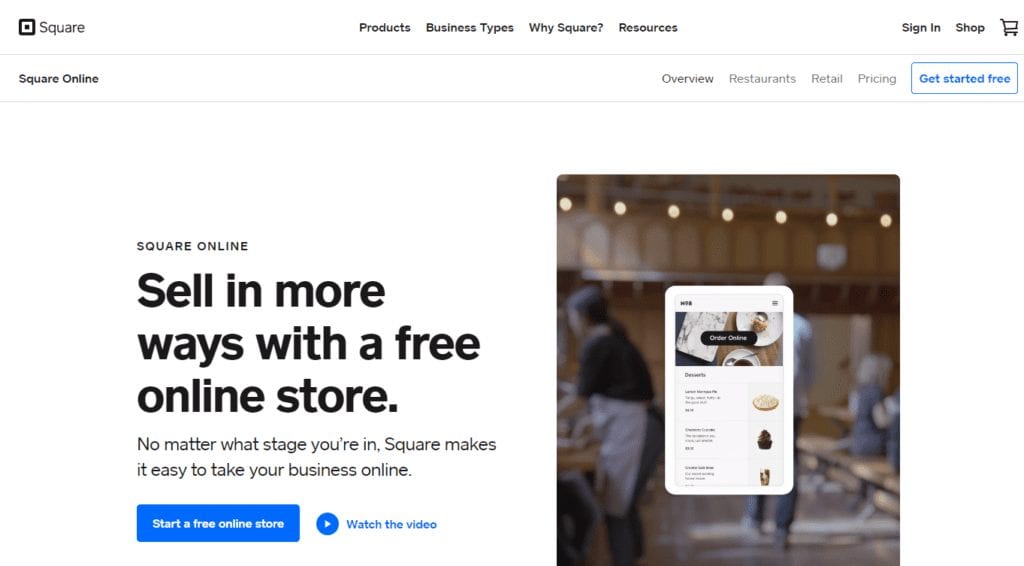
Square was launched in 2009 as a payment processing platform. Until Square purchased Weebly a few years ago, it wasn’t possible to build an online store with the platform — it was simply a payment processor you could connect with other online store builders.
Benefits of a Square Online Store
If you want to use Square as your payment processor or already use the Square point of sale (POS) system for your brick and mortar store, then you can quickly and easily build a store with the Weebly builder.
Easy to Use
Square Online is a user-friendly option for those who don’t have any knowledge of coding and web design. You can use the prompts to guide you through the entire setup process from start to finish, so within a few hours, you’ll have a fully functional store. And no one will ever know you lack the technical background required to build an ecommerce store. It’s easy for small businesses to build a Square website and accept online payments.
Affordable
Few ecommerce platforms make it possible to build and operate an online store for free, but Square Online does. With the free service, you don’t have access to all the features Square has to offer, but you can run your store and only pay the credit card processing fees for each transaction you complete.
Square Online Pricing and Features
Square Online offers multiple plans to choose from so that you can choose the one that works best for your business needs. If you want to be able to use a custom domain for your website, Square Online doesn’t offer this feature on the free option. The paid plans are as follows:
Professional
- $16/month ($12/month when paid annually)
- 2.9% + 30 cents per transaction
- Sell unlimited products (also in free version)
- Automatic inventory, order, and item sync with Square POS (also in free version)
- Offer pick-up, delivery, or shipping (also in free version)
- Instagram integration (also in free version)
- No Square branding or ads
- Publish to a custom domain
- Free domain for a year.
Performance
- $29/month ($26/month when paid annually)
- 2.9% + 30 cents per transaction
- All Professional Plan features, plus:
- Customer reviews
- Discounted shipping labels
- Abandoned cart emails
Premium
- $79/month ($72/month when paid annually)
- 2.6% + 30 cents per transaction
- All Performance Plan features, plus advanced features like:
- Lowest processing rates to save money on fees in your online store
- highest discounts on shipping rates
- Real-time shipping rate calculator
Every online store features a responsive design so that it looks great across desktop and mobile devices. You can quickly and easily see how your site looks in the search results to help boost your Google ranking to bring in more traffic.
Every online store also comes with SSL security so you can sell online with peace of mind, knowing your customer’s data is safe.
WIth higher paid plans, you can use on-demand delivery with third parties to deliver your orders for you., or offer in-house delivery. All plans make it easy to include a contact form so your customers can reach you.
What will you pay in transaction fees?
For payments made virtually with the Square ecommerce API, you’ll pay 2.9% + 30 cents per transaction. It’s worth noting this rate is fairly standard across the industry.
You’ll qualify for cheaper payment processing fees on any transactions accepted in person since there is a lower risk of fraud with those payments. This includes cards that swiped, tapped, or inserted.
The transaction fee is the same on the professional plan and performance plan as what you’d see on the free plan. If you upgrade to the premium plan, you’ll get a discounted transaction rate of 2.6% + 30 cents per transaction.
Square Gift Cards
To help expand your customer base and grow loyalty, your store can offer gift cards through the platform. You can order physical cards through Square or offer e-gift cards. If you choose to offer physical cards, you can upload a custom design, and purchase accessories like gift card sleeves.
With Square gift cards, your customers do not have to know that’s what you’re using to power your store. You’re under no obligation to use the custom design options, or rely on physical cards.
However, if you don’t use the custom design options, your Square gift cards won’t be branded to match your store.
Take Your Brick and Mortar Digital
For a lot of small business owners, running a physical store is hard enough. The idea of having to run a separate online platform to complement their in-person efforts can be overwhelming. Square Online makes it easy to add an online component at no additional cost. And, they even offer support for in-store pickup. This feature is important to compete with others who offer it but is something many customers look for. Whether it be for convenience or to avoid shopping in crowds, online ordering with same-day in-store pick-up is a feature that often comes at a premium on other builders.
Your inventory will sync across what’s available in-store and online so that when someone purchases the last of an item in-store, it isn’t available for purchase online until it is restocked. And if someone purchases the last of something online, it won’t be available in-store, so that you don’t oversell any items. You can easily adjust the available quantity of any particular item as your stock changes.
Square Online gives brick and mortar businesses an easy and effective way to build and maintain an e-commerce site so they can sell items, event tickets, and even provide online appointment booking, for free.
If you’ll need Square Online hardware (POS), you’ll pay:
- Square Reader for magstripe: the first reader free, each additional reader costs $10
- Square Reader for contactless and chip: $49 one-time payment
- Square Stand for contactless and chip: $169 one-time payment, or $16/month for 12 months
- Square Terminal: $299 one-time payment, or $27/month for 12 months
- Square Register: $799 one-time payment, or $39/month for 24 months
No Full Store Required
If you don’t want to build a full online store, Square Online gives you the freedom to create Square checkout pages to process payments, without building a full store. You can use a single shopping page for:
- Preorders and product launches
- Digital products
- Subscriptions
- Service payments
- Contactless shopping with QR code checkout
- Adding checkout functionality to an existing website
- Online appointment booking
- Contact forms
You can start selling online today, in just a few hours, with or without a full ecommerce site.
Square Online Pros
- No monthly fees if you use the free Square account
- Predictable pricing
- Easy to link the Square POS system to your online store
- Variety of advanced features for paying accounts
- Integrations with other ecommerce platforms and solutions
- Easy for small businesses to build an online presence
- A variety of marketing tools to make it easier to sell online.
Square Online Cons
- Shipping could use some work because there are no adjustable rates
- There is room for improvement with customer service.
- Some features are only available if you’re paying for the higher tier plans, which come with hefty monthly fees.
Examples of Square Online Websites
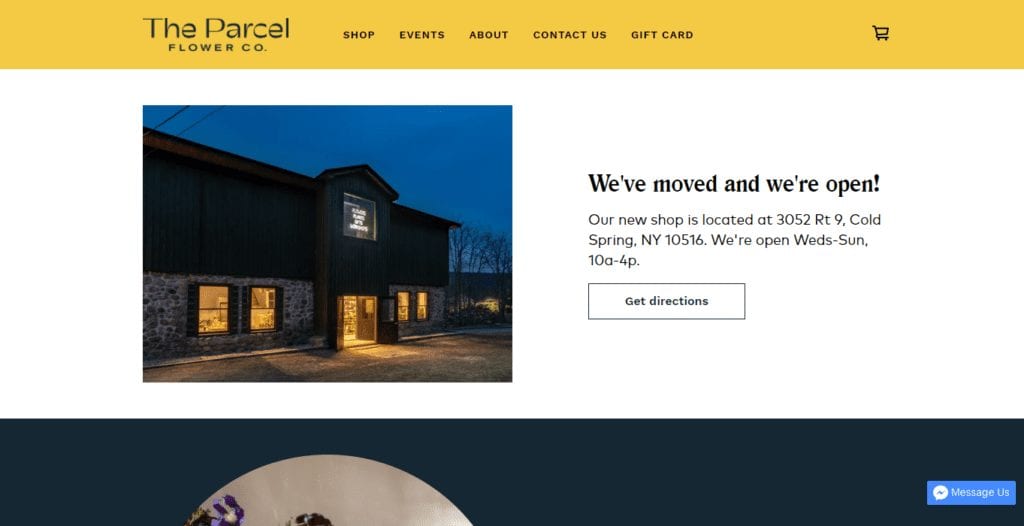
There are plenty of examples of Square websites online today. It’s a common choice for many in the beauty industry – particularly with salons and spas. It’s super easy to set up and have customers pay for their appointments.
The Salon

The Green Pharmacy

Beauty Marked

Little Sister

The Parcel Flower Shop
Ouid

Poor George

How to Set up Square Online Store
Building a free online store with Square can be done in 6 steps – but I’ve included the extra step of promoting and managing your store. Don’t worry, even if you have no previous technical experience, you can be up and running in no time. The intuitive interface makes it easy to walk through the setup process for your retail store.
Step One: Create Your Square Account
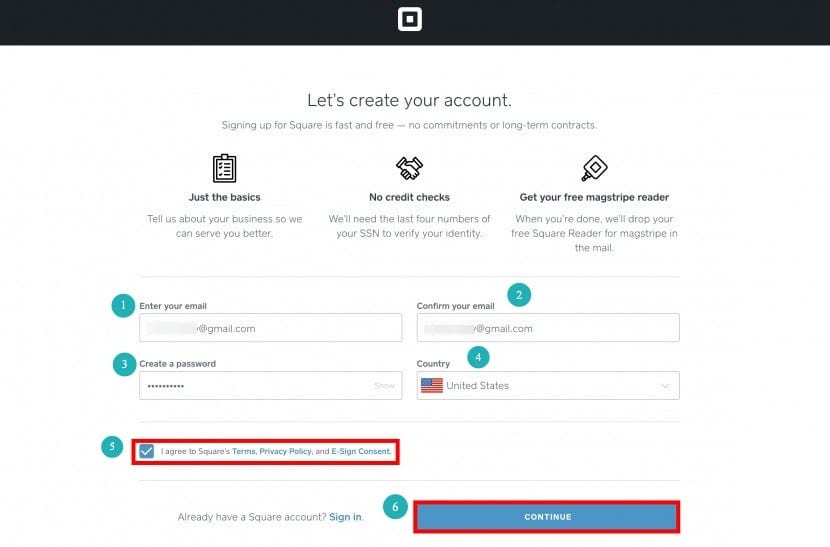
Before you can get started, you have to create your Square Online account. You’ll be asked for your email and country. You’ll create a password, and agree to the terms and conditions. If you already have a Square online account, you’ll just need to log in and make sure everything is up to date.
From there, you’ll provide more information about who you are, your business, and the kind of store you want to build. You’ll have to provide basic information about your business, including the business type, category, EIN, your estimated annual revenue, and employees.
After that, you’ll enter your personal information, including your name, address, date of birth, the last four of your social security number, and your phone number. You’ll also be given the chance to connect your bank account to receive payments.
Then, you’ll be prompted to answer questions about your store and operations. Answering these questions makes it easier to get personalized recommendations about features to include on your site.
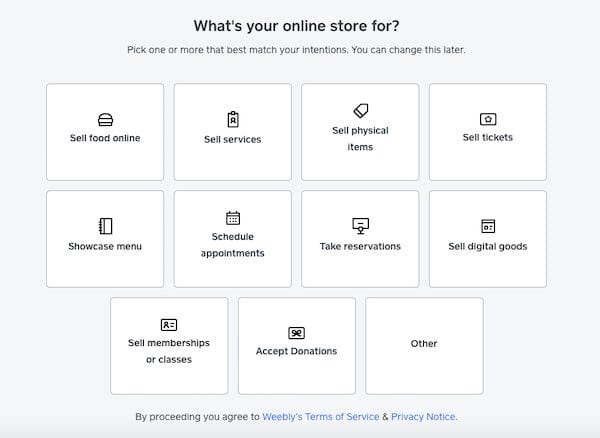
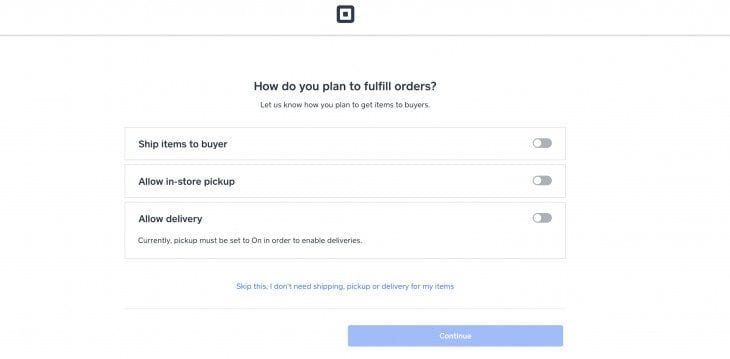
For instance, if you’re a solely online business, you probably don’t want to offer pick up and local delivery, but if you’re a local restaurant, you’ll definitely want to offer those things. Sure, you can ship a cake, but it’s not as easy as shipping a book or DVD.
Then, you’ll choose the type of store you want to open. Unless you need a single ordering page, select the “full online store + website.” This is what gives you a multi page site for your free online store.

Step Two: Customize Your Store
After you’ve created your account and given all the information described above, you’ll move on to designing your website through the Weebly-powered builder.
You’ll start by choosing your layout, colors, and fonts. Then, you’ll add your logo.
At that point, you’ll be redirected to the Square Online Store editor where you can make more customizations with more sections and pages. The photo below demonstrates how you’ll be able to edit elements like your header, footer branding, and more.
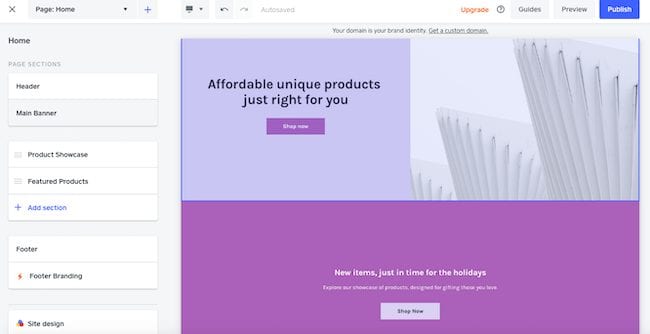
With this editor view, you can take a look at your site so you can see a desktop and mobile version. When you’re ready, you can push your store live.
Step Three: Add Products
Once you’re happy with the design, you can start adding your products. This is the most important, and time-consuming step.
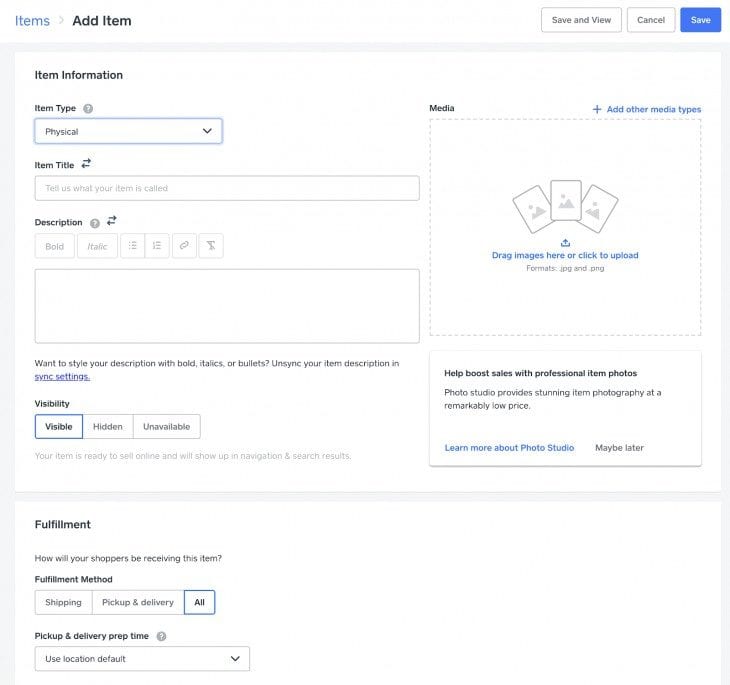
Add products by clicking the plus sign in the upper left-hand corner and selecting “product.” Add all the relevant information including the type, title, description, photos, SEO options, fulfillment settings, and variants. When complete, save it and view it using the test site link.
Repeat for all the products you want to have on your site when you launch.
If you have a lot of products, you can save time by uploading your products in bulk with a CSV or Excel file. If you’re already using Square POS, the items there will be transferred to your online store automatically, You’ll be able to choose whether or not you want to include any of these items for online sales.
To upload products in bulk:
- Visit your Square Dashboard.
- Click “Items.”
- Download the Template – either the CSV or Excel file.
Be sure to upload any product images, too. Before pushing your site live, make sure you have the product descriptions the way you want them, along with any variations you sell. If you’re already using the Square POS system, then the new online store will pull your existing products. All you have to do is sign in to your Square account and start pulling in the items you want to feature.
Step Four: Choose Your Domain Name
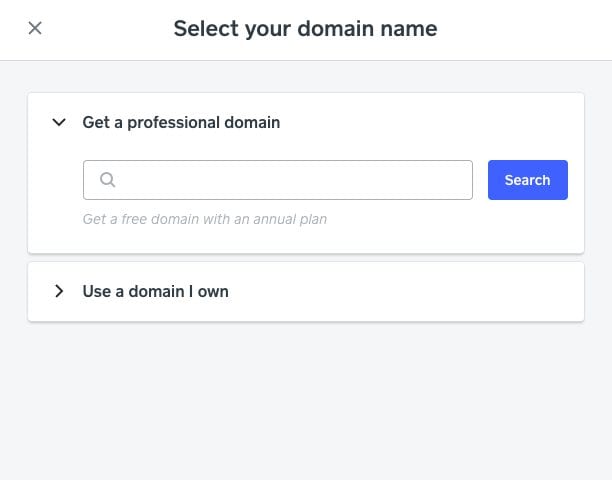
After you’ve set up your products, choose your domain name, if applicable. If you’re using the free plan, your URL will automatically generate, with the free Square subdomain. It will be your-store-name.square.site. To make use of a custom domain, you’ll have to purchase a paid Square Online store plan.
If you choose one of the paid plans, you can purchase your own domain name for $12/year through Square Online, or connect it to a domain you already own.
Step Five: Setup Financials and Checkout Options
Before you can push your site live, you’ll have to set up all your shipping, taxes, and how to allow your customers to check out. From the dashboard, navigate to Store > Setup.
For shipping, you’ll set where you will be shipping the products from, the regions you’ll ship to, and the associated shipping rates. If you don’t want to offer free shipping, you can offer flat rates, real-time rates, and more. You’ll also be able to take advantage of real-time shipping settings if you have a premium plan.
You can print shipping labels from directly within the Square dashboard, making it easy to manage ecommerce site orders.
If you plan on allowing customers to pick up their orders in-store, you’ll be able to add the appropriate information. You can also opt to offer local delivery within a certain radius of your store’s location.
Visit Setup > Pickup to indicate the dates, times, and other relevant information for customer pick up.
In the Taxes section, list all the physical store locations to calculate U.S. sales tax rates for your orders. You’ll be able to set tax rates for every state and country you ship to. You also have the option to charge taxes on the shipping rates. Using the automatic tax calculator in the U.S. handles all of this for you. All you need to do is indicate your shipping address and the regions you ship to.
Depending on where you’re selling, you may find the Square Online automatic sales tax calculator useful. If you’re shipping from one state to another, Square will handle the tax in both states. Square online will also take care of Canada’s 5% tax rate, in addition to any territory-specific taxes.
But, if you plan to participate in online selling outside of the US or Canada, you’re on your own when it comes to sales tax. You’ll have to manually add the tax rates, which can be cumbersome. Square Online takes no responsibility if you do not remain in compliance with taxes.
The final step is to fill out your checkout settings. Navigate to the Checkout label on the left-hand side of the dashboard.
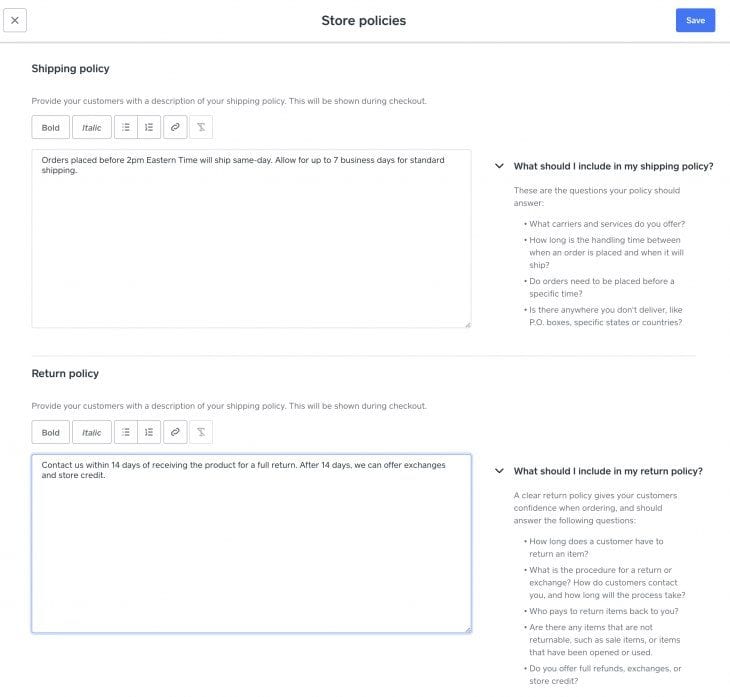
You’re automatically connected to Square Online for accepting online payments. You’ll also be able to add Google Pay and Apple Pay. If you have a paid plan, you can connect PayPal. Here is where you will add any store policies, adjust advanced settings like checkout mode, gift cards, and other options.
Here is where you’ll set up all your store policies for checkout, shipping, and returns. Though you don’t have to provide this information to get your store operational, it’s always a good idea. Having the information available for your store visitors is an important part of the overall customer experience.
It doesn’t need to be long and full of legalese. State when items generally ship, and whether or not returns are accepted. Outline how long a customer has to return an item, and whether or not you will cover return shipping.
Step Six: Launch
Once all the settings are in place, it’s time to take your store live. From the Store Editor, click the “Publish” button in the upper right-hand corner. This will officially launch your site. After you’re live, you can see the front end of your site where customers can start placing orders.
Step Seven: Promote and Manage
Now that you’re live, it’s time to promote your business and take advantage of the tools and settings available in the Square Online Store. You can connect the Square POS for in-person transactions, create coupon codes and store emails, connect your business to social media, set up customer forms, and email sign-ups. Those features are available even on the free plan.
Those using a paid plan can also use more advanced tools including product reviews and abandoned cart recovery emails. Product reviews
Once things get up and running, you’ll be able to view transactions, manage orders and inventory, and generate reports from within the Square dashboard. A plus is that if you carry the same inventory in your store as you do online, you’ll never oversell. Any time you sell the last of an item in store or online, it will be made unavailable until you restock it.
Common Questions about Square Online?
Launch Your Ecommerce Website With Square Online
Now that you know how easy it is to set up a Square online store, there’s no reason not to get started with Square Online right away. If you still want to go with something like Shopify, check out my guide on how to start a Shopify store. If you’re looking for something different than what Square checkout has to offer, keep browsing EcommerceCEO.
If you need more information and support through your ecommerce journey, I’d love to connect with you. I’ve spent years building this as a resource for people who want to build an ecommerce business…and I hope you find it useful. My goal is to help you find the right ecommerce platform for your needs, so you can sell online in the way that works best for you. Feel free to leave me comments with your thoughts and questions.


